Tuesday, February 14, 2012
Pirate Ship Mast
We borrowed a small 3-piece pirate ship that stretched half way across the stage. We set it up and stepped back, added some barrels, and decided it needed a mast. We were very restricted on time but I had just been a substitute in a PE class where the girls were playing volleyball. I suggested we use a volleyball pole, cover it in brown butcher paper, drape a rope and hang a flag. Voila! It worked perfectly! We had the base hidden behind the pirate ship where it wouldn't show.
Monday, September 12, 2011
Stage Blood!
There are lots of recipes for stage blood but my favorite thus far is so simple and cheap!
Materials:
Chocolate Ice Cream Syrup
Strawberry Ice Cream Syrup
Bowl/Cup
Directions:
Mix the two syrups together until you have the right color for blood.
This blood is totally safe and tastes good! Just double check that your actor isn't diabetic.
Sunday, September 4, 2011
Mask Making by Kayla Martin
The most important thing to remember for this first step is to cover ALL facial hair with vaseline. That includes eyelashes and sideburns.

You will want to put a drop cloth under your volunteers and cover your table with a tablecloth or newspaper. Have a bowl of water ready. You will also want to take a roll of plaster of paris gauze and cut it into narrow strips of different lengths. Make sure you put two or three small pieces aside for the nose later.

Cover your volunteer's hair with plastic wrap and make sure that all hair is completely covered. If there is any showing near the face then cover with vaseline.

Starting on the top of the head, cover the whole face with strips to form a bowl. As it hardens the volunteer will feel it cool and start to separate from their face. Make sure that you have 2-3 layers of guaze on the face.


It is very important to not cover the nose. We will do that later.

Wait for it to completely dry. This should only take about 5-10 minutes.

Have the volunteer pull their head back as you pull the plaster face forward.

Cover the nose holes with the 2-3 strips you set aside.

Once it is completely dry set it in a box of cat liter so that it will hold its shape. Completely cover the inside with vaseline. Fill with plaster. You can buy this in big bags at any hardware store. Let it sit for a few days until it is completely dry and then separate the shell from the plaster. Now you have an exact copy of your face. Now you can use oil based clay to shape your mask. Make sure that you have plastic wrap between the clay and the cast of your face.


Put paper/newspaper through a shredder. The finer the shred the easier it will be to manipulate it later.

I use wallpaper paste for pre-pasted wallpaper for the glue. You can find this at Home Depot for $5.

I know this sounds gross but you want the paper/glue mixture to be the texture of cat vomit. Eww. I know.

Put a thick layer of paper mache on the clay version of your mask. Make sure that there is plastic wrap between the clay and the paper mache.


Put a layer of paper towel over the completed form and cover the paper towel with more glue. Let it completely dry. This can take a few days. Then you can paint it any way you want. I always start by spray painting the mask black and then add color.


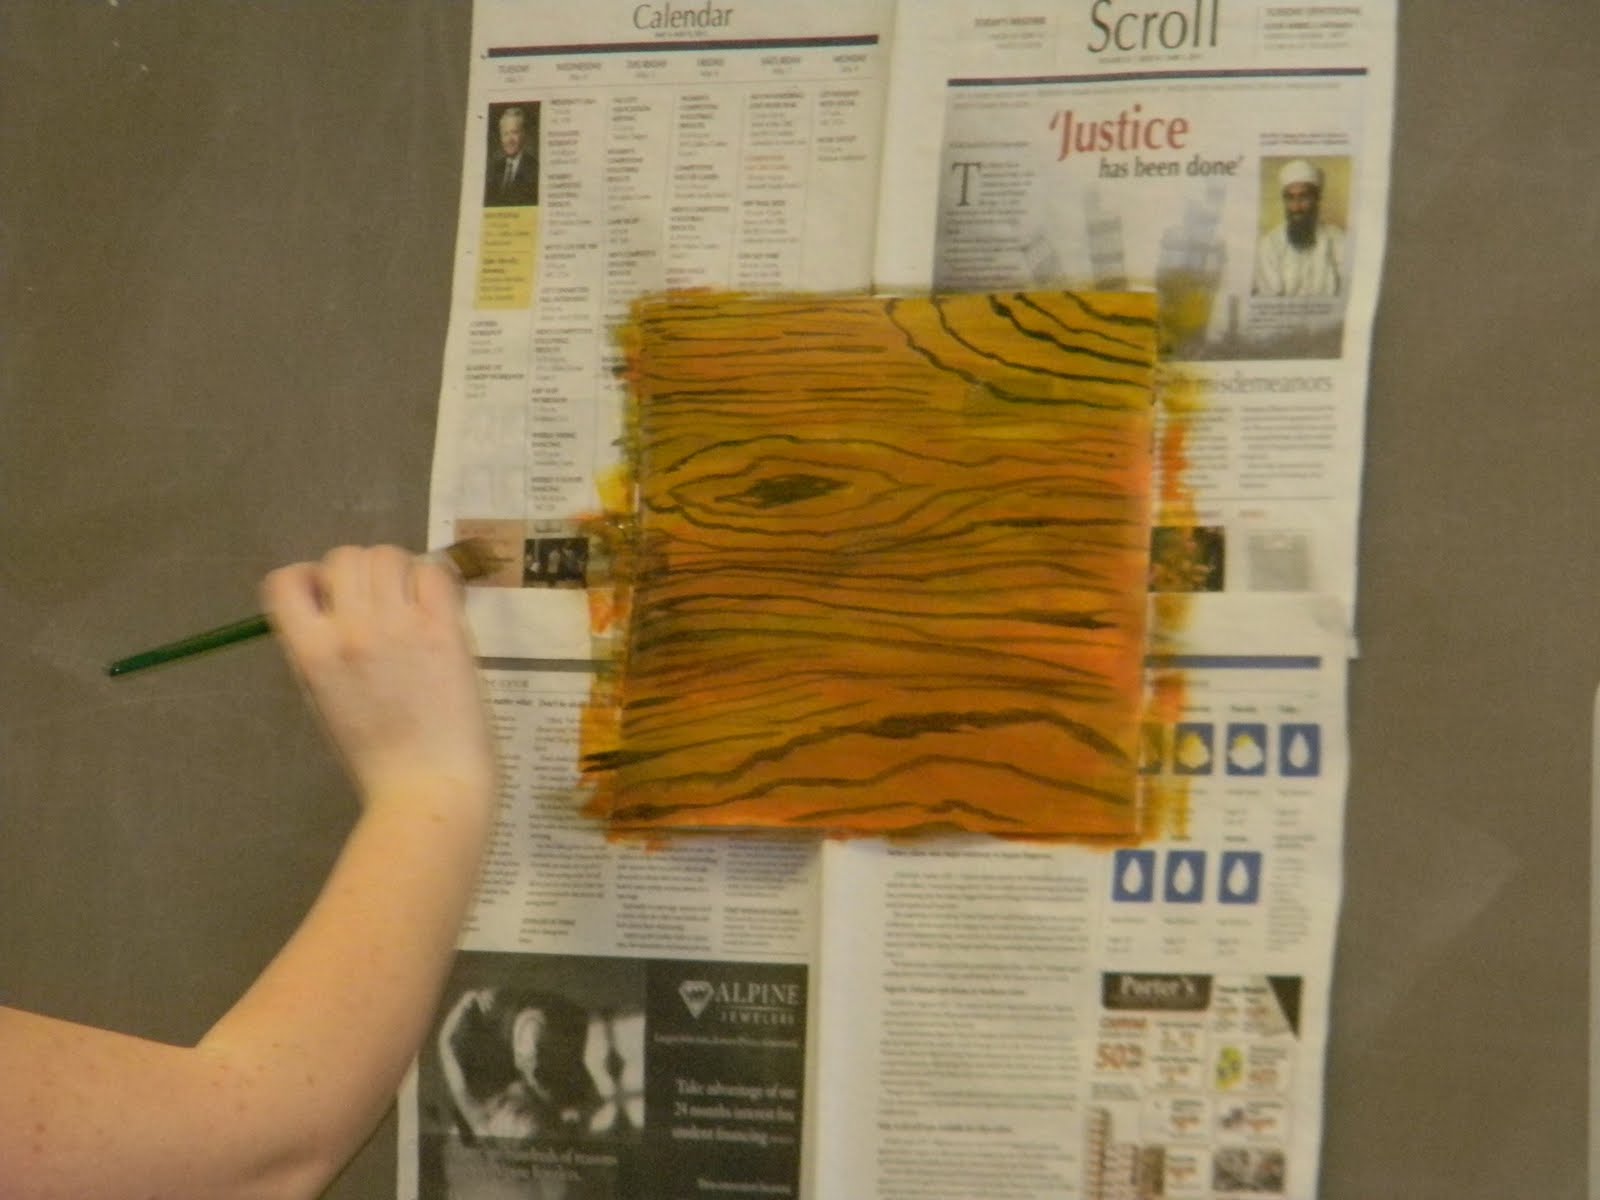
Painting Faux Wood by Chelsey Campbell
Materials:
Acrylic paint
Something to mix your paint in, plastic containers work well
Paint brushes- a mixture of styles
1 should be a cheep foam paintbrush
1 should be a cheep brush with uneven bristles
A kitchen scrub brush with bristles
Water
Samples of wood grain
A drop cloth

These are my two samples
Setup:
Place drop cloth underneath the item you plan to paint.
If the item is plastic or has never been painted before you will need to prime the item.
If the item is plastic or metal prime the item with spray on adhesive. If the Item is wood then you can just use junk paint. If the item is canvas then you need to starch the canvas.
Now we mix the paint.

Mixing and Choosing Colors:
You should try to match the colors from your sample. However you have to start with a work up with colors that are not quite the same as the sample. Try to look at the woods undertones. Is it red toned, yellow toned, or green toned. My first sample was a light redish wood. For the work up colors, or base coat I like to use a yellow ocher and a dark salmon. To create the yellow I mixed one part yellow ocher and a dab of lemon yellow. The salmon was made with yellow ocher and a red orange color. If you have paint containers that can be sealed you should mix all your paint before starting the actual painting process. For this tutorial I mixed the paint as I went because it would dry to fast if I mixed it all at the beginning. Stay tuned for more paint mixing tricks.


Painting
Before starting to paint always, always wet your brushes. This prevents paint from going up the ferrule and keeps your paintbrushes in good condition much longer. After mixing my “work up” colors I painted a linear scumble. A scumble is a painting method which one color is used then is seamlessly blended into another color. This is done multiple times all over the item you are painting. As you can see in the pictures below that it just becomes a mess of color, no gradient at all. In wood grain it is important to do scumble that has a horizontal flow because the grain of the wood has the same flow.


After completing the scumble I let it dry and moved on to my next sample.
In this sample the wood was more greenish grey so my “work up” colors were taupe and brown. To create taupe you mix purple and yellow together. Then I just used a burnt umber brown with a tad of burnt sienna.


Then I did a linear scumble using these two colors.

Next I mixed the grain color. The grain needs to be darker than the background and is usually a green brown. To create this color I mixed forest green with burnt umber and yellow ocher. I then added some water to make the paint thinner and very slightly transparent. You don’t want the grain to stark against the background.


To paint the grain on my first sample I would have used the corner a foam brush but I didn’t have one that day so I used a very small angled brush. I looked at my sample an replicated what I saw in the grain, this simply takes practice.

After painting a few grain stripes. Then while the paint was still wet I used my scrub brush and brushed it over the grain, horizontally running with the grain. This crates a natural softness to the grain so it isn’t so sharp and contrasting. You can create knots or anything you want in you wood grain. One thing to note is that where there is a knot or where there are ‘v’ patterns in the wood the grain is usually farther apart in those areas. The grain is much closer together when it is in straight lines.


On my next sample I used a cheep brush with very un-even bristles. I taped the brush into the paint getting only the tips of the bristles wet. Then I taped the brush again on my drop cloth removing some of the paint. I then lightly brushed the paintbrush over the paper in a horizontal, left to right pattern. This step was then repeated underneath the grain created by the first brush stroke. To create a knot in the wood using this method you place the brush on the page and then twist in a circle. Then lightly brush around the knot to put it in the same world as the other grain.


The last step in the painting process it to put a wash over everything you just painted. To mix the wash I mixed together my taupe and my grain color. Then I mixed in a lot of water. The wash needs to be extremely transparent. I then brushed over both samples with this wash. When using a wash be careful not to let the brush strokes show. Where you put your brush down and pick it up shows in the paint. To avoid these lines use long steady strokes.


These are the finished products.

Yarn Crafts by Christiana Quada


To make yarn wig take good size piece of cardboard, and wrap yarn around it at least 150 times, depending on desired thickness. Slide yarn off cardboard and cut ends to make the individual hair strands. Sew strands onto a piece of felt, to look like a part in the hair. Tie hair in pigtails.

To make dream catcher wrap metal wring in yarn. Then use yarn to make a web like effect on the frame. Decorate with feathers.

To make a tassel wrap yarn/ string around hand about 30 times.

Slide off hand and tie a loop around the top of it.

Cut bottom loops to make a fringe.

Yarn Dolls

Wrap yarn around cardboard about 50 times. Slide off and tie of pieces for heard, arms and legs.

Cut loops to make a fringe in the end of the arms and legs.

Subscribe to:
Posts (Atom)