Materials:
Acrylic paint
Something to mix your paint in, plastic containers work well
Paint brushes- a mixture of styles
1 should be a cheep foam paintbrush
1 should be a cheep brush with uneven bristles
A kitchen scrub brush with bristles
Water
Samples of wood grain
A drop cloth

These are my two samples
Setup:
Place drop cloth underneath the item you plan to paint.
If the item is plastic or has never been painted before you will need to prime the item.
If the item is plastic or metal prime the item with spray on adhesive. If the Item is wood then you can just use junk paint. If the item is canvas then you need to starch the canvas.
Now we mix the paint.

Mixing and Choosing Colors:
You should try to match the colors from your sample. However you have to start with a work up with colors that are not quite the same as the sample. Try to look at the woods undertones. Is it red toned, yellow toned, or green toned. My first sample was a light redish wood. For the work up colors, or base coat I like to use a yellow ocher and a dark salmon. To create the yellow I mixed one part yellow ocher and a dab of lemon yellow. The salmon was made with yellow ocher and a red orange color. If you have paint containers that can be sealed you should mix all your paint before starting the actual painting process. For this tutorial I mixed the paint as I went because it would dry to fast if I mixed it all at the beginning. Stay tuned for more paint mixing tricks.


Painting
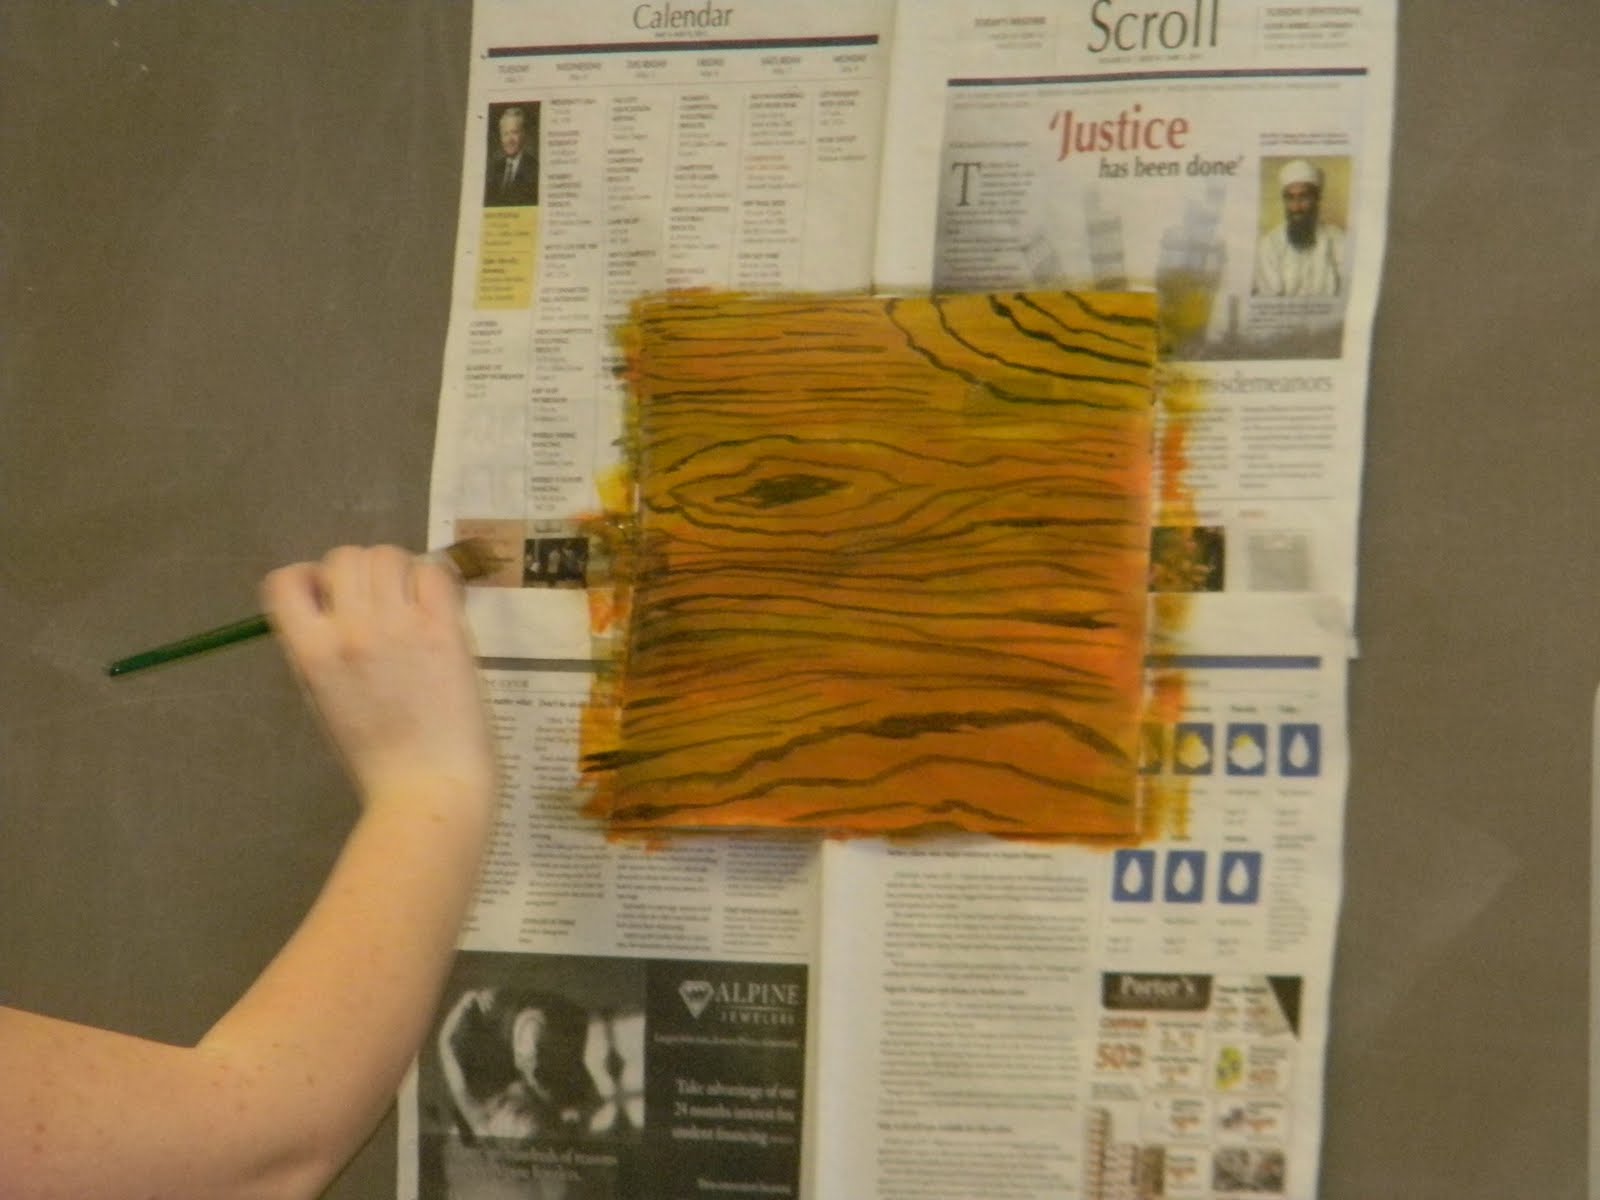
Before starting to paint always, always wet your brushes. This prevents paint from going up the ferrule and keeps your paintbrushes in good condition much longer. After mixing my “work up” colors I painted a linear scumble. A scumble is a painting method which one color is used then is seamlessly blended into another color. This is done multiple times all over the item you are painting. As you can see in the pictures below that it just becomes a mess of color, no gradient at all. In wood grain it is important to do scumble that has a horizontal flow because the grain of the wood has the same flow.


After completing the scumble I let it dry and moved on to my next sample.
In this sample the wood was more greenish grey so my “work up” colors were taupe and brown. To create taupe you mix purple and yellow together. Then I just used a burnt umber brown with a tad of burnt sienna.


Then I did a linear scumble using these two colors.

Next I mixed the grain color. The grain needs to be darker than the background and is usually a green brown. To create this color I mixed forest green with burnt umber and yellow ocher. I then added some water to make the paint thinner and very slightly transparent. You don’t want the grain to stark against the background.


To paint the grain on my first sample I would have used the corner a foam brush but I didn’t have one that day so I used a very small angled brush. I looked at my sample an replicated what I saw in the grain, this simply takes practice.

After painting a few grain stripes. Then while the paint was still wet I used my scrub brush and brushed it over the grain, horizontally running with the grain. This crates a natural softness to the grain so it isn’t so sharp and contrasting. You can create knots or anything you want in you wood grain. One thing to note is that where there is a knot or where there are ‘v’ patterns in the wood the grain is usually farther apart in those areas. The grain is much closer together when it is in straight lines.


On my next sample I used a cheep brush with very un-even bristles. I taped the brush into the paint getting only the tips of the bristles wet. Then I taped the brush again on my drop cloth removing some of the paint. I then lightly brushed the paintbrush over the paper in a horizontal, left to right pattern. This step was then repeated underneath the grain created by the first brush stroke. To create a knot in the wood using this method you place the brush on the page and then twist in a circle. Then lightly brush around the knot to put it in the same world as the other grain.


The last step in the painting process it to put a wash over everything you just painted. To mix the wash I mixed together my taupe and my grain color. Then I mixed in a lot of water. The wash needs to be extremely transparent. I then brushed over both samples with this wash. When using a wash be careful not to let the brush strokes show. Where you put your brush down and pick it up shows in the paint. To avoid these lines use long steady strokes.


These are the finished products.

No comments:
Post a Comment